| < Power and Cooling | Home | Bill of Materials > |
Building WOPR: A 7x4090 AI Server
Frame
If you've made it this far, the frame is easy. Almost too easy. Our miner friends have produced countless ways to open-air mount a system and GPUs, so we might as well ride along.
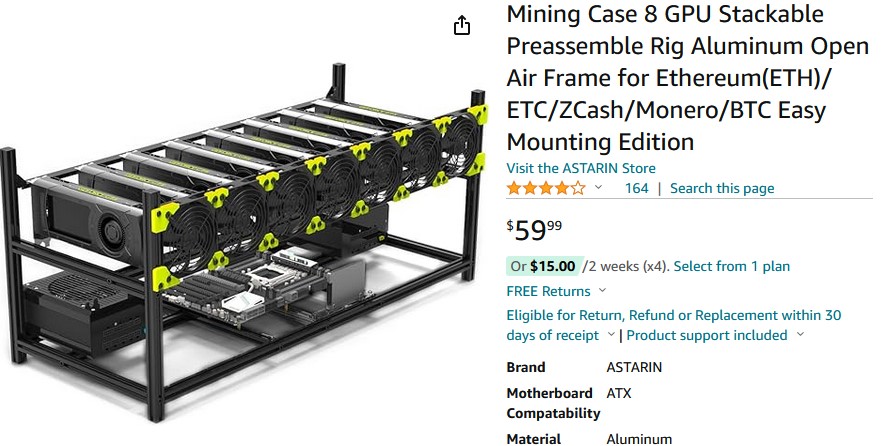
The mining frame I used is the Mining Case 8 GPU Stackable Preassemble Rig Aluminum Open Air Frame for Ethereum(ETH)/ETC/ZCash/Monero/BTC Easy Mounting Edition
Say that 3 times fast. And by the way, I used two per system.
FrankenFrame
If you look at the product pics for this frame, they show a lower deck to which a motherboard and some power supplies are mounted with a rack for the GPUs above.
Thinking about this for a minute, this really sucks. The power connectors for our GPUs are on the top, which implies our power supplies would go much better up above those GPUs. We require an "upper deck" to which we can mount our power supplies and cable manage neatly.
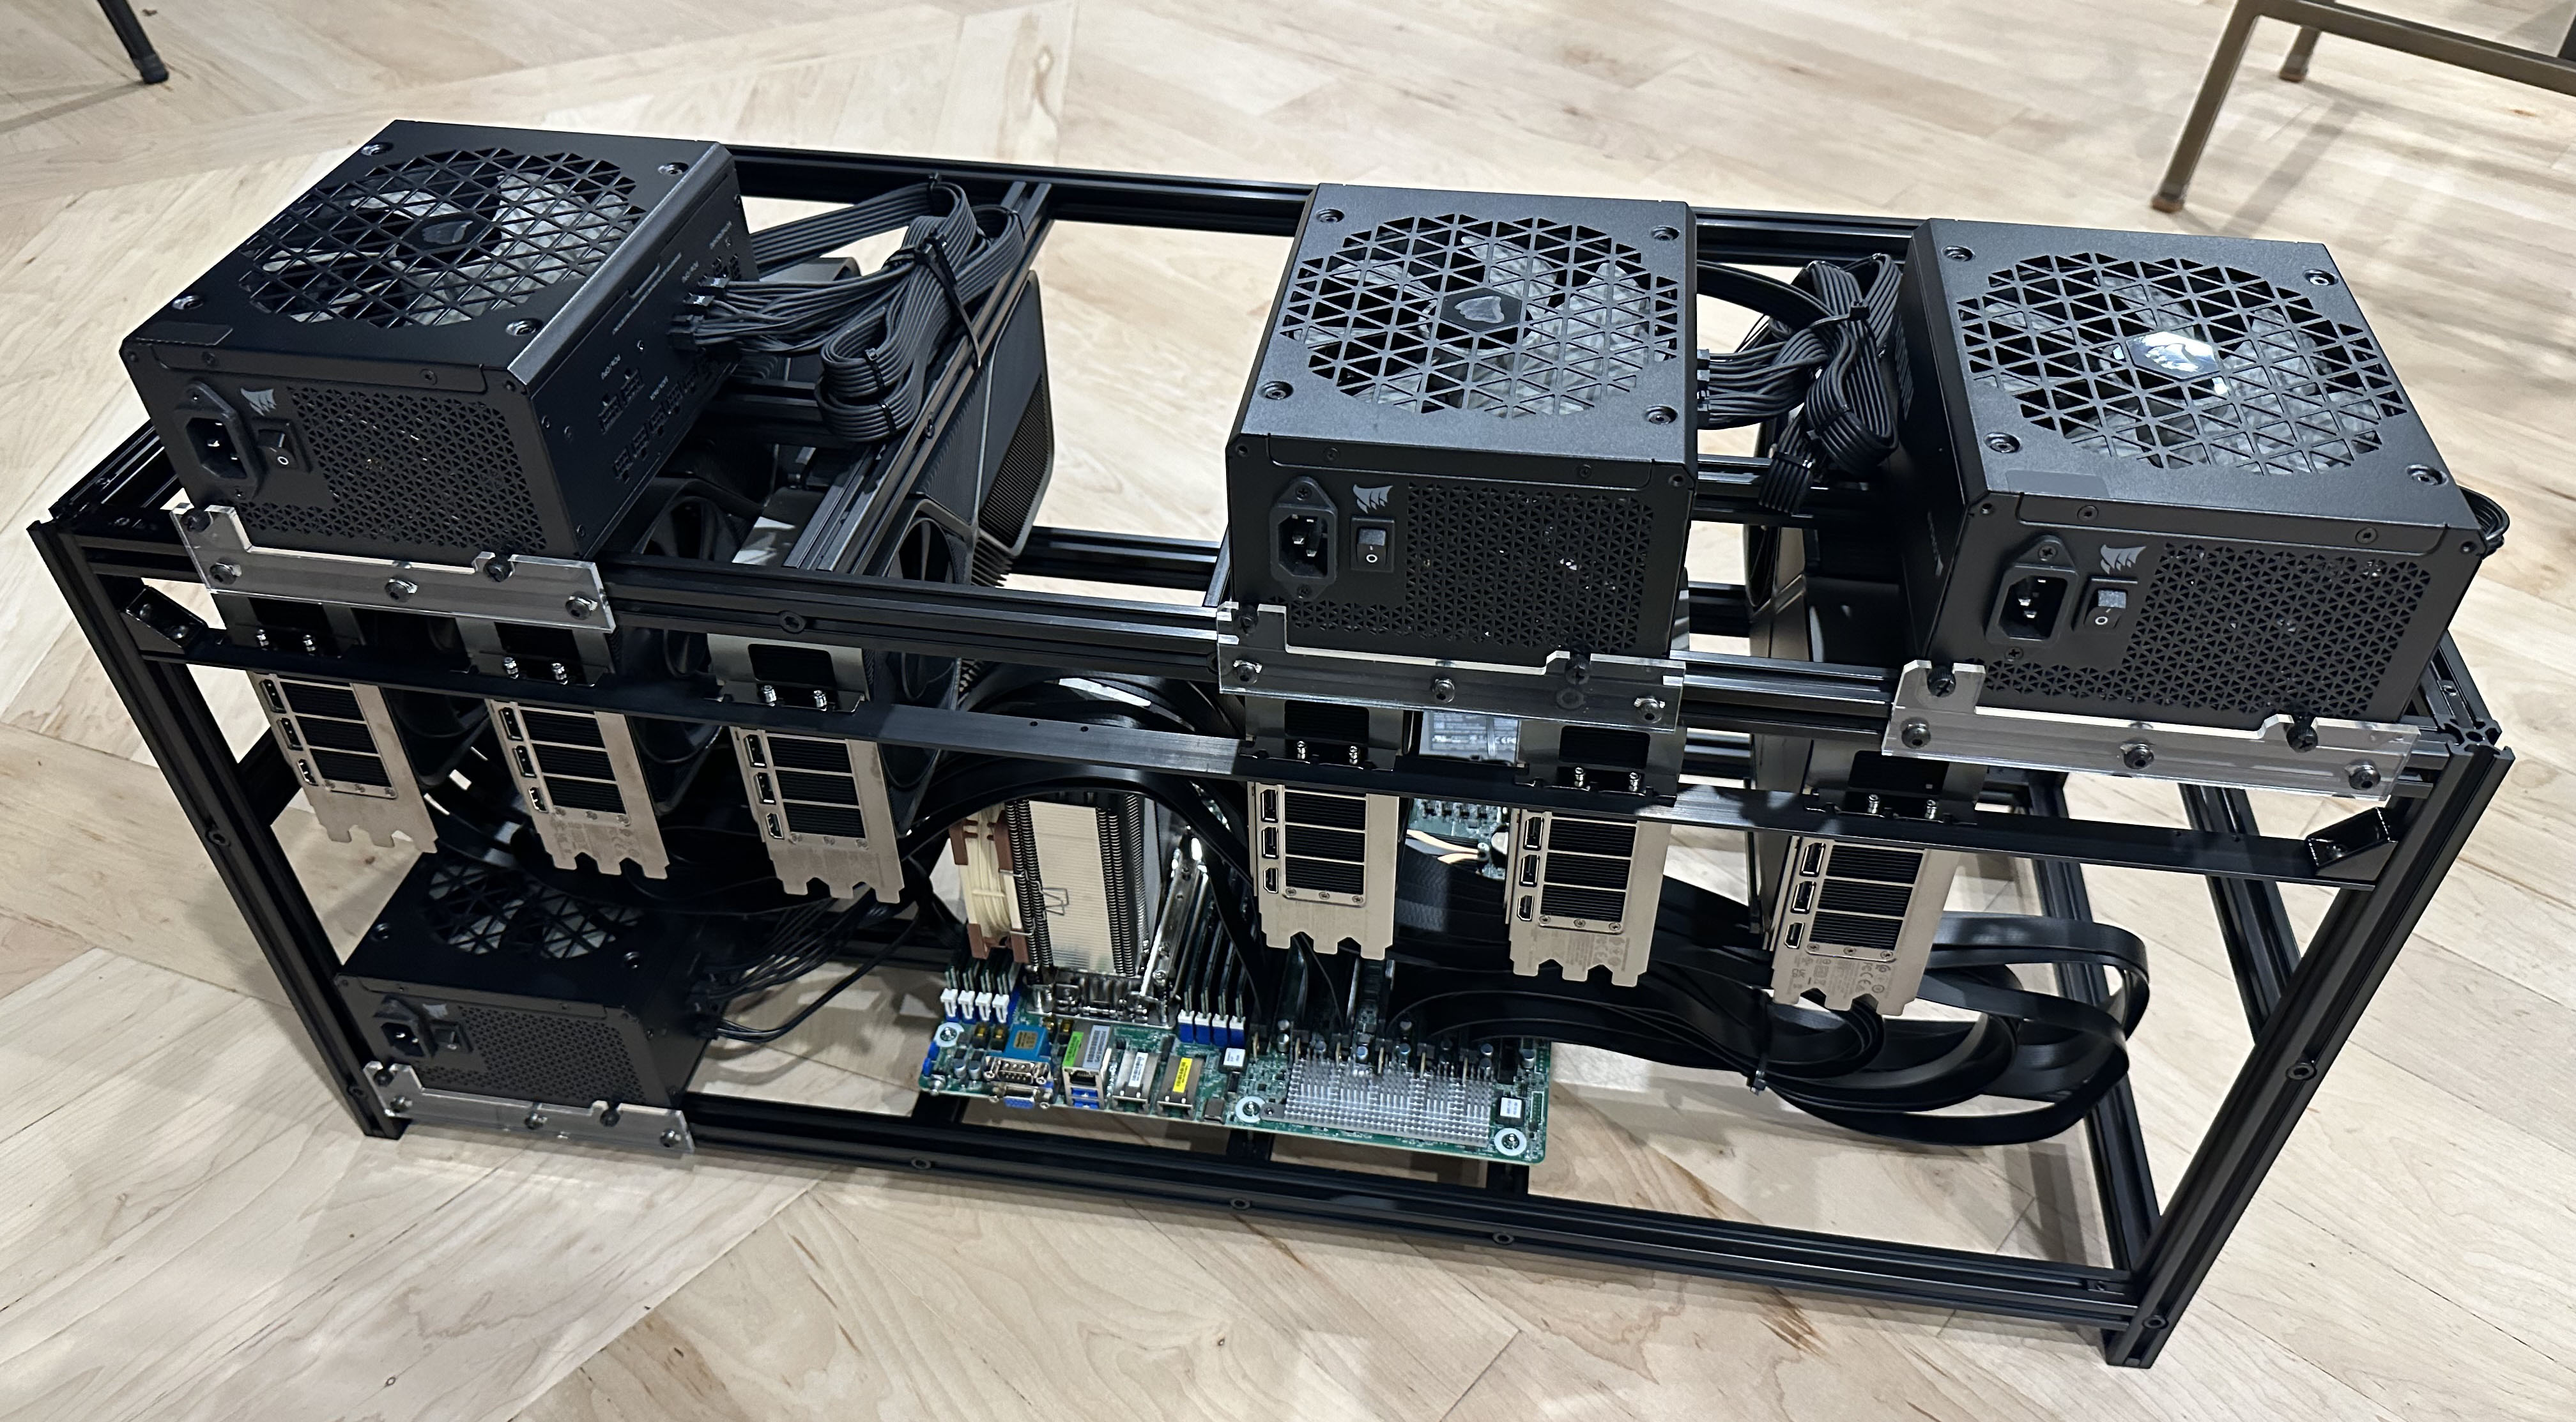
Thankfully, if you buy two of these frames you can utilize bits of the second to create that upper deck. I don't have progress pics of this, but in general what you want to do is:
- Unbolt the lower crossmembers from each set of legs belonging to the second frame.
- Attach those crossmembers using some of the L clamp hardware to the top of each set of legs for the first frame. You'll have to remove the protective cover from the top of each leg to do so but they'll come right out if you wiggle them.
- Fasten the lower deck from the second frame to the top of the first frame where you bolted the crossmembers. To do so you'll use bolts that go into the crossmembers as well as L clamp hardware to the legs. This step is very similar to the normal installation of the lower deck, you're just doing it up high.
With that, you have a nice fancy frame that allows for top mounting of the power supplies.
Other Tips
- In assembling the frame, the screws on one leg of the L clamps came installed backwards. I had to remove and replace them the other way around
- If you're tempted to remove the protective paper from the acrylic power supply and drive mounts, don't be. It's really stuck on there. If you must, I found hot water helped loosen it up but even so it took a bit of elbow grease.
| < Power and Cooling | Home | Bill of Materials > |
| Nathan Odle - <nathan.odle@gmail.com> @mov_axbx on X |